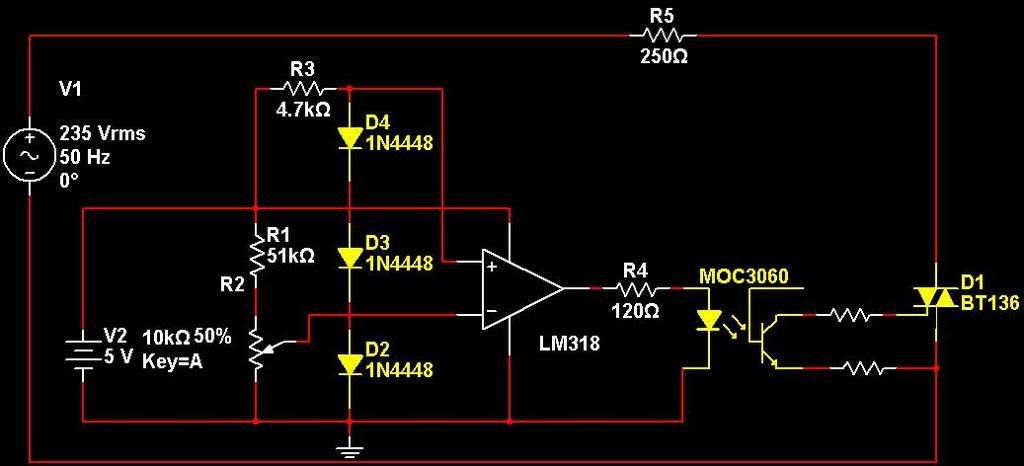
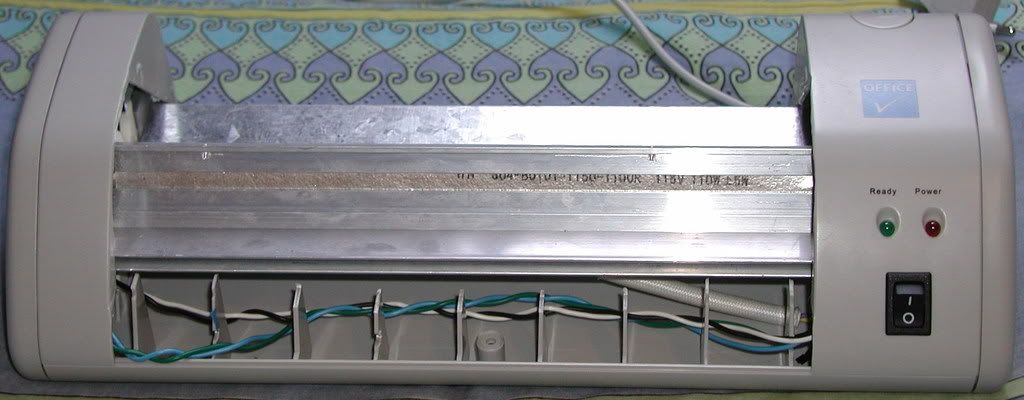
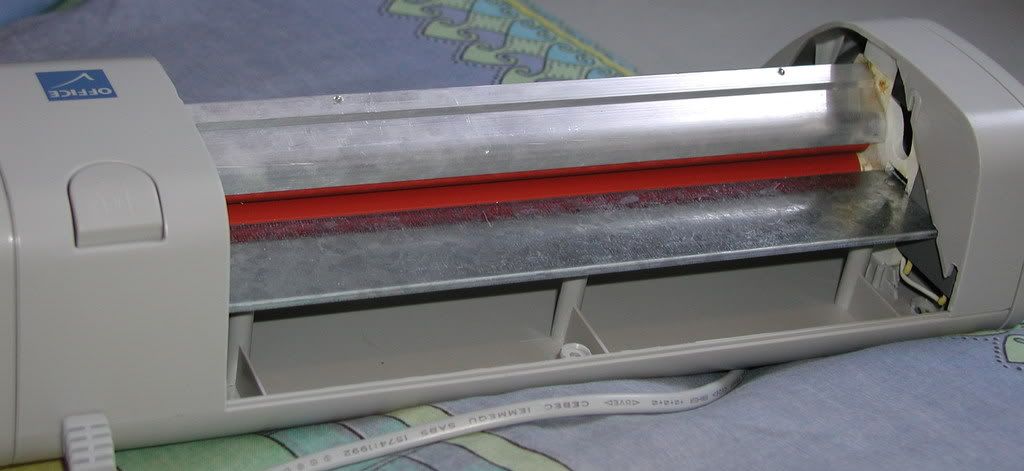
Making PCB with laser printer and laminatorWhat you will need for making PCB really fast and with small traces is any laser printer, even cheapest will do. You will need to buy, or find some other way one of those office laminator, wich would normaly be used to laminate documents or contact cards. You will have to mod it a bit... So heaters/rollers are both 115v in my case and are in series, they are connected to triak [which can be any with enough voltage rating and some amps, say 2A is more then enough, I used BTA06], which applys 230Vac on them or not when temperature is right (set). R5 is not resistor, but heaters themself
Note:Just to make note, I used opto-triak, MOC3061 and for triak BTA06. I had to use 3x 1n4148, to have higher voltage on LM, two of them on board, one is the sensor, and was placed instead of original bimetal switch.10k pot or should I say trimer is 10 turn for easy setting. values after LM are to be set to your setting and how MOC is wired, you can see from its datasheet. Do not forget to use fuse, I used original... Now all you have to do is print you PCB image on some paper, many people use, I think it is called Staples Photo Basic Gloss, I use Asus product catalog. after you have image on paper, you place image facing down on copper, board was cleaned as you would for UV + spray way...and run as many times throung laminator as you think it will be enough for ink to stick to copper good, I did this about 15 times to be sure. Then soak board in hot water with liquid soap... After about 10min (I don't hurry) you start to rub paper... ok enough about this, here is few Youtube videos where you can see this. Settings:You will need to find your temperature, that works good with your printer, it will be probably between 180C and 200C. I went down the middle and set it to 192C, where it stops.
|
|
Application Note on bridging audio amplifiers
A discussion on bridging audio amplifier circuits like LM3886. Includes a schematic to drive a matched pair of amplifiers in a bridged configuration, power supply considerations for LM3886 and TDA1514 power amplifier circuits-especially in bridged pairs. |
Application Note on parallel-bridging LM3886 audio amplifiers
How to make it loud - real loud. (230 watts rms into 8 ohms without clipping from 4 ICs. How to match LM3886s for parallel operation, then bridge the matched parallel banks. If you are not familiar with bridging amplifiers (BTL configuration), read the Application Note on bridging listed left in article Application Note on bridging audio amplifiers. |
| My first car audio system My second car audio system My third car audio system |